Home
Terminals
Connectors
Crimp tools
Relay kits
Relays
Shipping
Fuse box's
Diagrams
Tubing
Manuals
Fuses

View Cart
Here are a couple tips to hopefully help some of you achieve good results using Posi Products.
You will have varying results depending on the size and type wire being used, with differences in wire strand count and
insulation thickness. These factors will determine what you can get away with.
In some cases you can even use slightly larger wire sizes then the Posi is rated for.
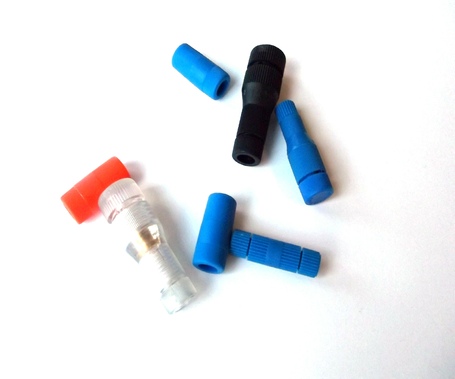
These are pretty easy to use, They won't loosen with vibration, and can be sealed with shrink tube if needed.
I have even seen people use these on the 3 yellow stator wires after the connector burnt up on them, for years
with no problems at all.
You will have varying results depending on the size and type wire being used, with differences in wire strand count and
insulation thickness. These factors will determine what you can get away with.
In some cases you can even use slightly larger wire sizes then the Posi is rated for.
These are pretty easy to use, They won't loosen with vibration, and can be sealed with shrink tube if needed.
I have even seen people use these on the 3 yellow stator wires after the connector burnt up on them, for years
with no problems at all.
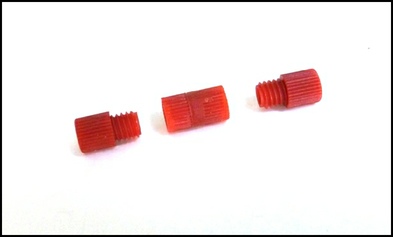
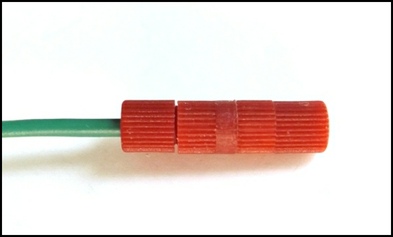
Here is a typical mini Posi-lock for 20-24
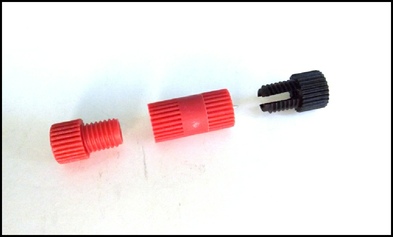
These are 3 piece connectors used for joining 2 wire ends together.
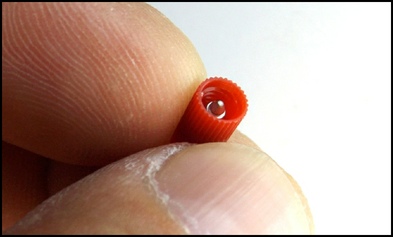
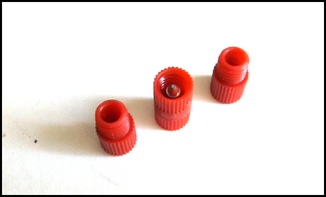
You can see the metal contact in the center of this very small PL1824
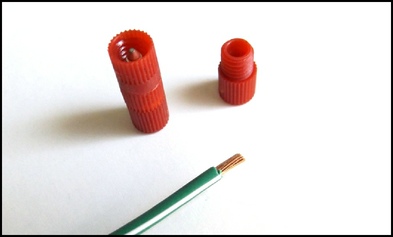
Depending on the wire size and the Posi-lock being used
you need to strip the wire insulation.
( A little cleaner then what I have here hopefully )
I find 4 mm to 6 mm is all I need to get a good tight connection.
Do not nick or cut wire stranding.
This reduces the strength of the connection, and potential current flow,
causing a possible over heated connector over time.
If you nick the wire while striping it, cut the end off and strip it again.
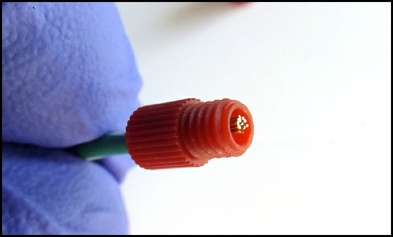
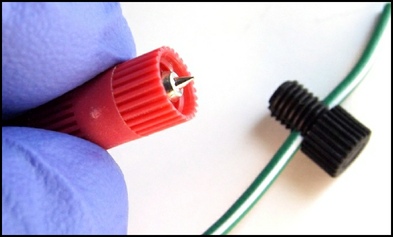
Insert the wire through the end of the Posi-Lock
The wire should protrude 2 to 3 mm. ( I'm a little short in this photo )
Much more than this is not necessary, but the wire can be a bit longer.
Much more than this is not necessary, but the wire can be a bit longer.
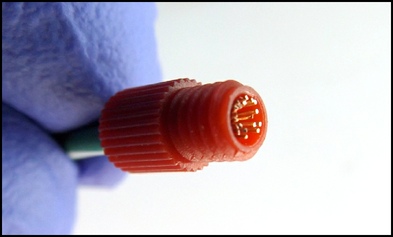
Now I spread the wire out evenly around the perimeter of the posi-lock.
This should help ensure you get good contact with a majority
of wire stranding. And you will have a good strong connection
that you should not be able to pull out.
This should help ensure you get good contact with a majority
of wire stranding. And you will have a good strong connection
that you should not be able to pull out.
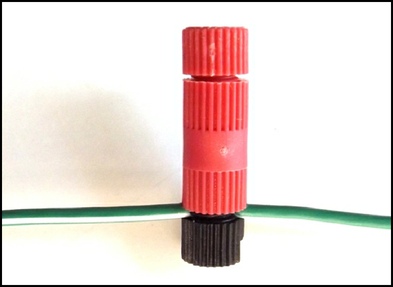
Screw the end onto the center conductor carefully,
And you should be done.
You can apply a pretty good amount of force when screwing these down.
But do be careful with the Smaller posi-locks.
You don’t want to strip the threads
Some of the larger sizes can even be tighten down
with a small pair of prier with no damage to the Posi-lock.
And you should be done.
You can apply a pretty good amount of force when screwing these down.
But do be careful with the Smaller posi-
Some of the larger sizes can even be tighten down
with a small pair of prier with no damage to the Posi-
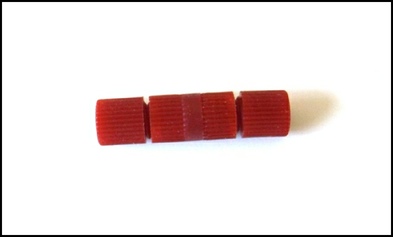
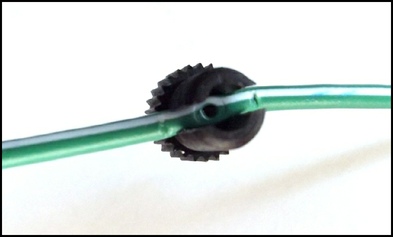
Posi-Taps for taking a single wire end, and then tap an existing wire.
Posi-tap installation will be very similar to the Posi-lock install.
(Note) the tap side end cap must be done first, so the tap
can be screwed down into place.
Posi-
(Note) the tap side end cap must be done first, so the tap
can be screwed down into place.
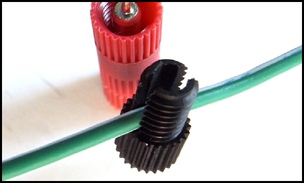
Insert the end cap to the wire you will be needing to tap power
(or ground) from.
Notice the sharp wire piercing
point on the conductor Tap.
(or ground) from.
Notice the sharp wire piercing
point on the conductor Tap.
Carefully start the tap body threads on the cap.
Once the threads are started,
finish screwing the tap body onto the end cap.
Now you are done with the tap end.
And you can move on to the other end to finish up.
The opposite end of the Posi-Tap is done exactly the same as
the Posi-lock.
I have never been a user of conductive grease
but this may be a good place to us it.
Once the threads are started,
finish screwing the tap body onto the end cap.
Now you are done with the tap end.
And you can move on to the other end to finish up.
The opposite end of the Posi-
I have never been a user of conductive grease
but this may be a good place to us it.
Here the end cap is inserted
onto the wire, and the wire
is seated in the bottom of
the end cap.
onto the wire, and the wire
is seated in the bottom of
the end cap.
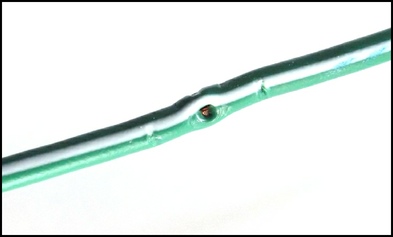
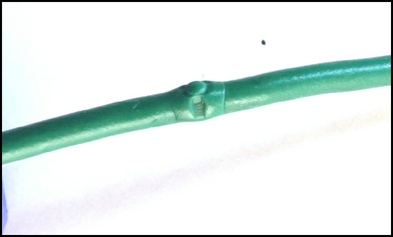
This is what the wire looks like after removing the tap body and end cap.
Back Side
Tap Side